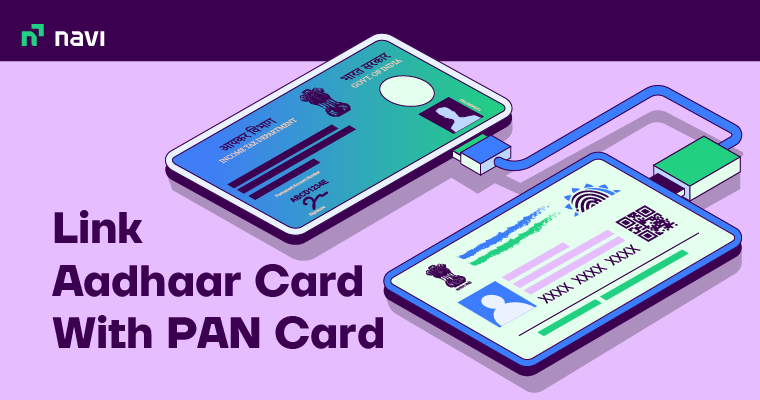
How to Update Aadhar Card Online and Offline 2023?
The Aadhaar card issued by UIDAI (Unique Identification Authority of India) is an ID card that contains a 12-digit unique identification number and all your details such as name, age, address, gender and more. It is accepted everywhere for verification purposes. If you want to know about the process of Aadhaar card update, this blog is definitely for you. Here we focus on the process of online Aadhar update, name, mobile, and phone number change, and more.
Latest Update
UIDAI recently announced that people, whose Aadhaar cards were issued more than 10 years ago, can update their demographic details on myAadhaar portal for FREE from 15th March, 2023 to 30th June, 2023.
How to Update Aadhaar Card Details Online?
You can change your Aadhar card details online using UIDAI’s self-service portal. To change Aadhar card details, such as name, address, date of birth, gender, and language, all you need is your Aadhaar number and your registered mobile number. The following are the steps for online aadhaar update:
- Step 1
Go to the Self Service Update Portal (https://ssup.uidai.gov.in/ssup/) of UIDAI.
- Step 2
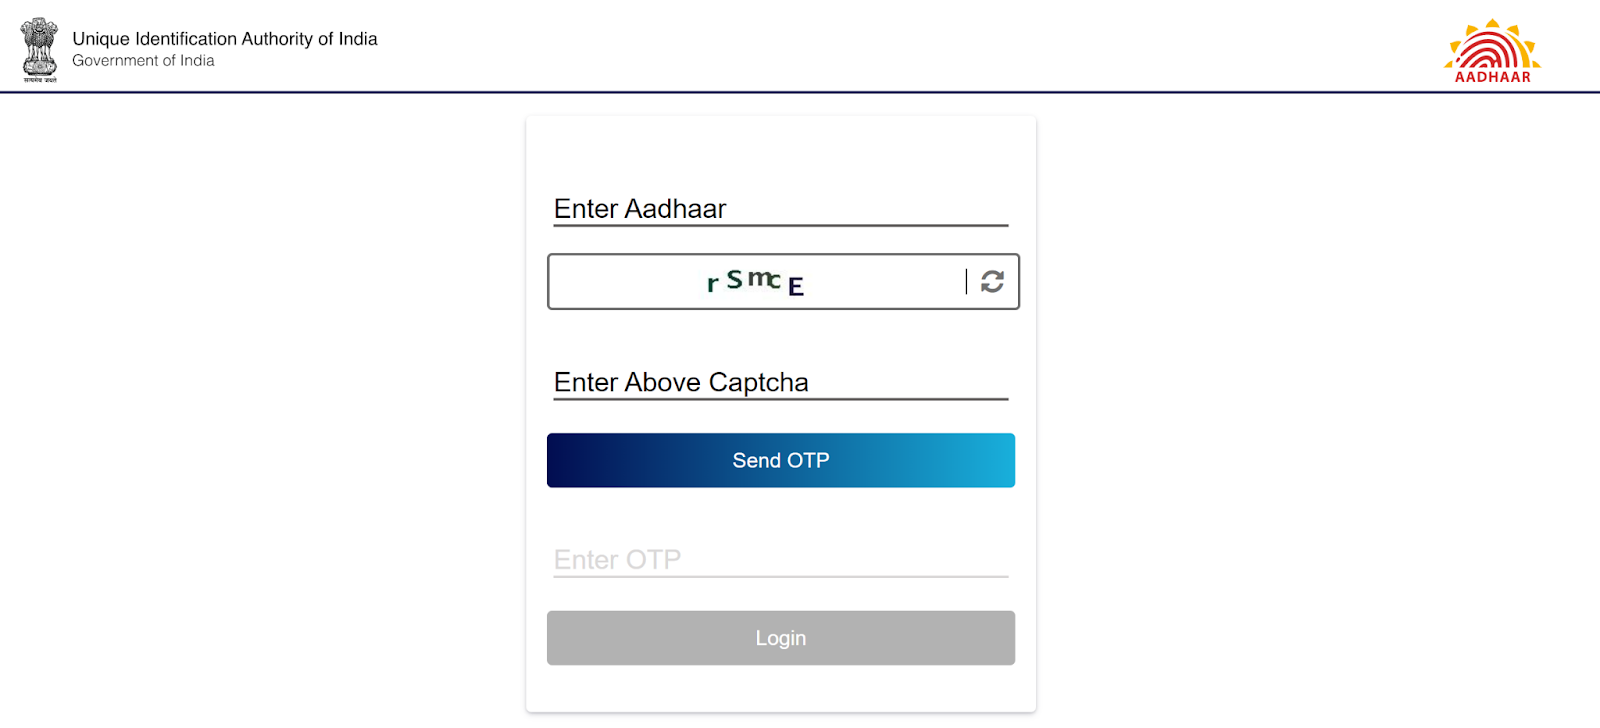
Click on the ‘Login’ option, enter your Aadhaar number, the captcha code displayed on the screen, and click on ‘Send OTP’.
- Step 3
Enter the One Time Password received on your registered mobile number and click ‘Login’.
- Step 4
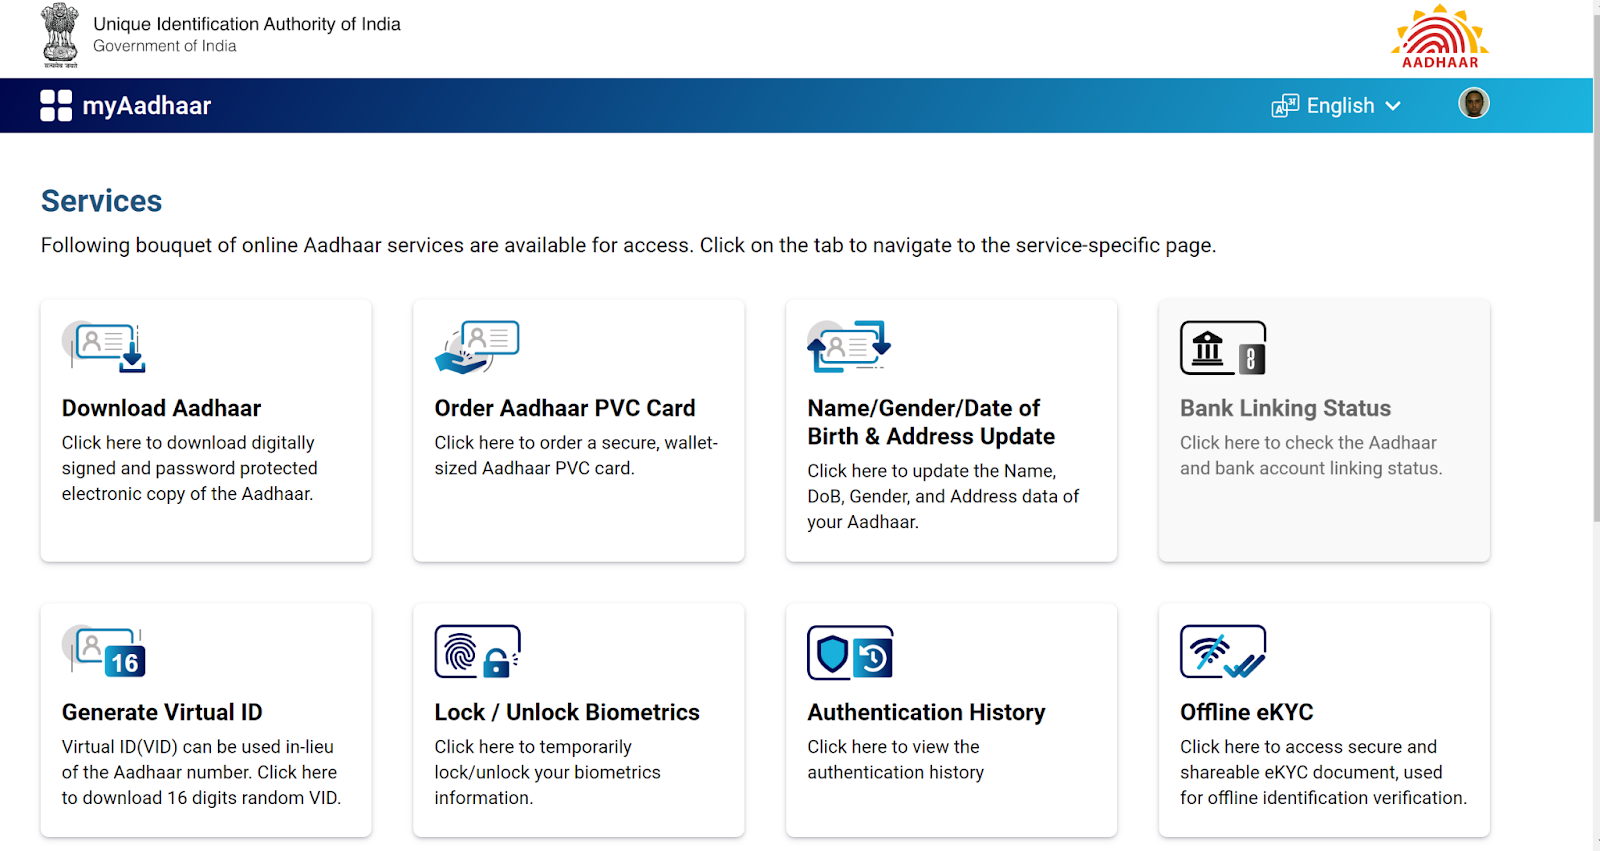
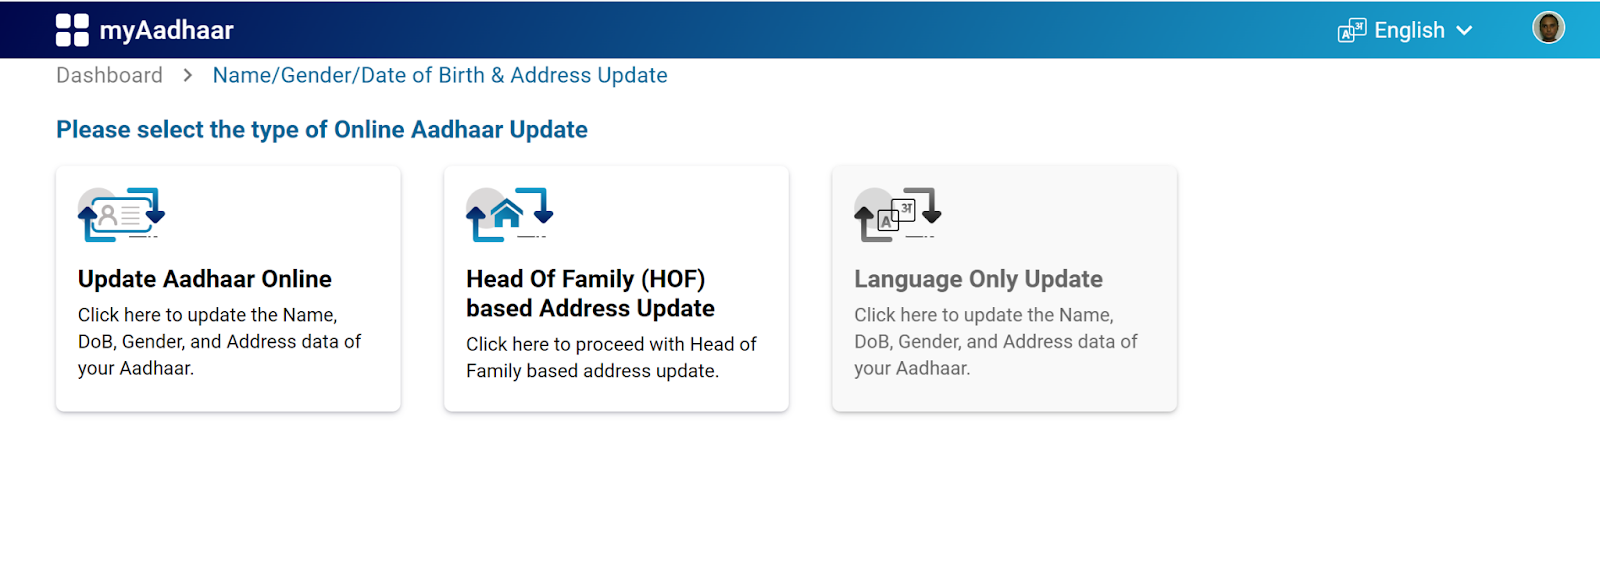
Once you login to your account, you will be shown a bouquet of AADHAR services. Click on the ‘Name/Gender/Date of Birth & Address Update’ card.
- Step 5
Now, click on ‘Update Aadhaar Online’ from the available options.
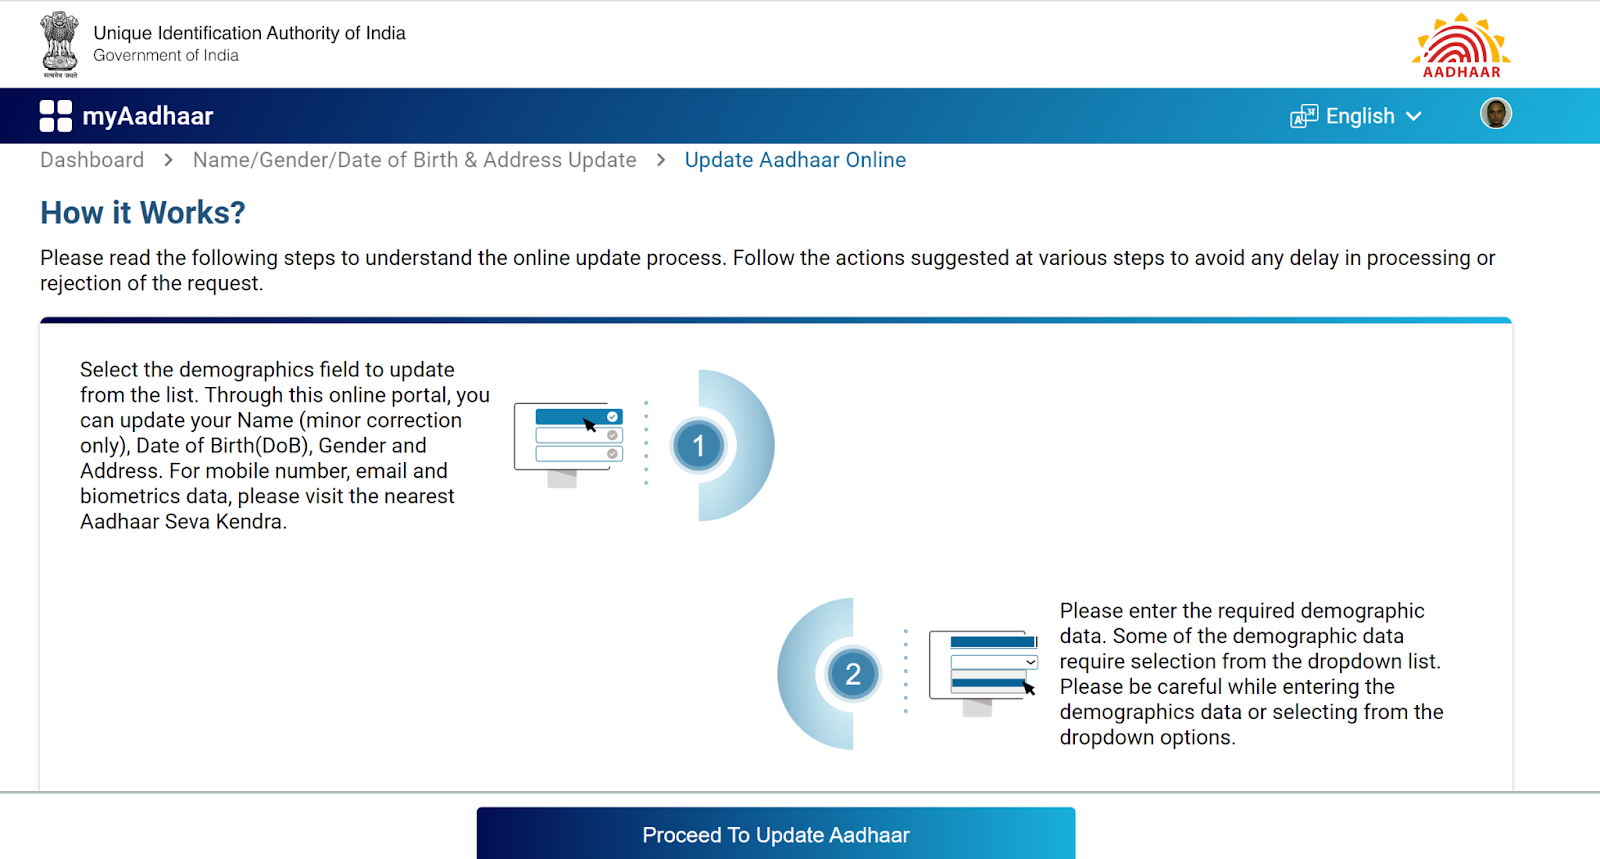
- Step 6
On the next page, click on ‘Proceed To Update Aadhaar’. But before you proceed, do read the instructions carefully.
- Step 7
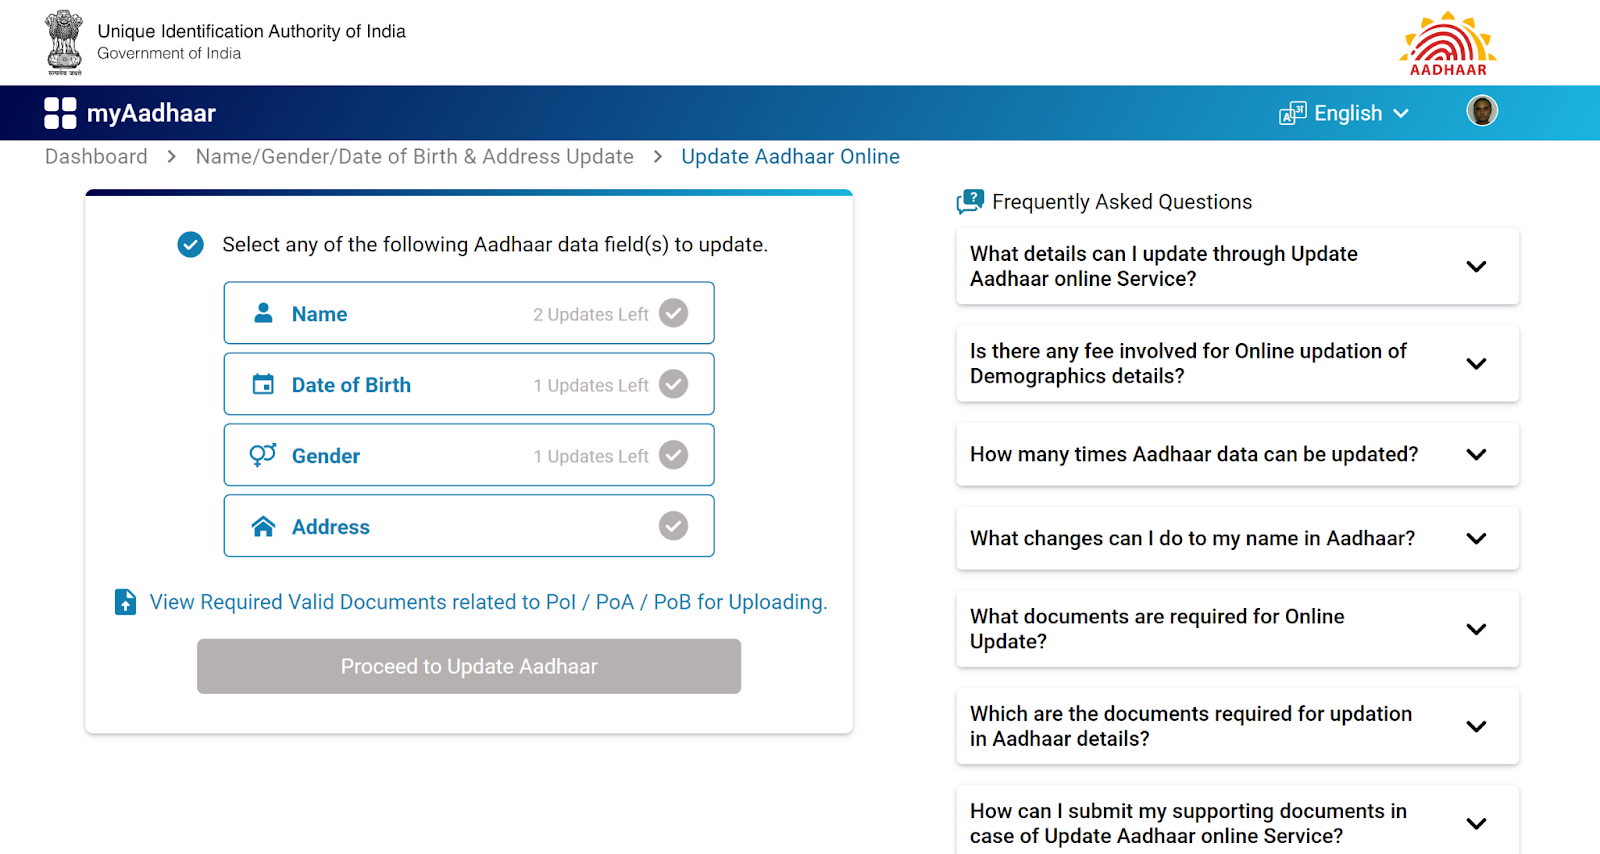
Now, you can choose the details you want to update on your Aadhar. However, please note that there is a limit on the number of times you can initiate a change or correction.
- Step 8
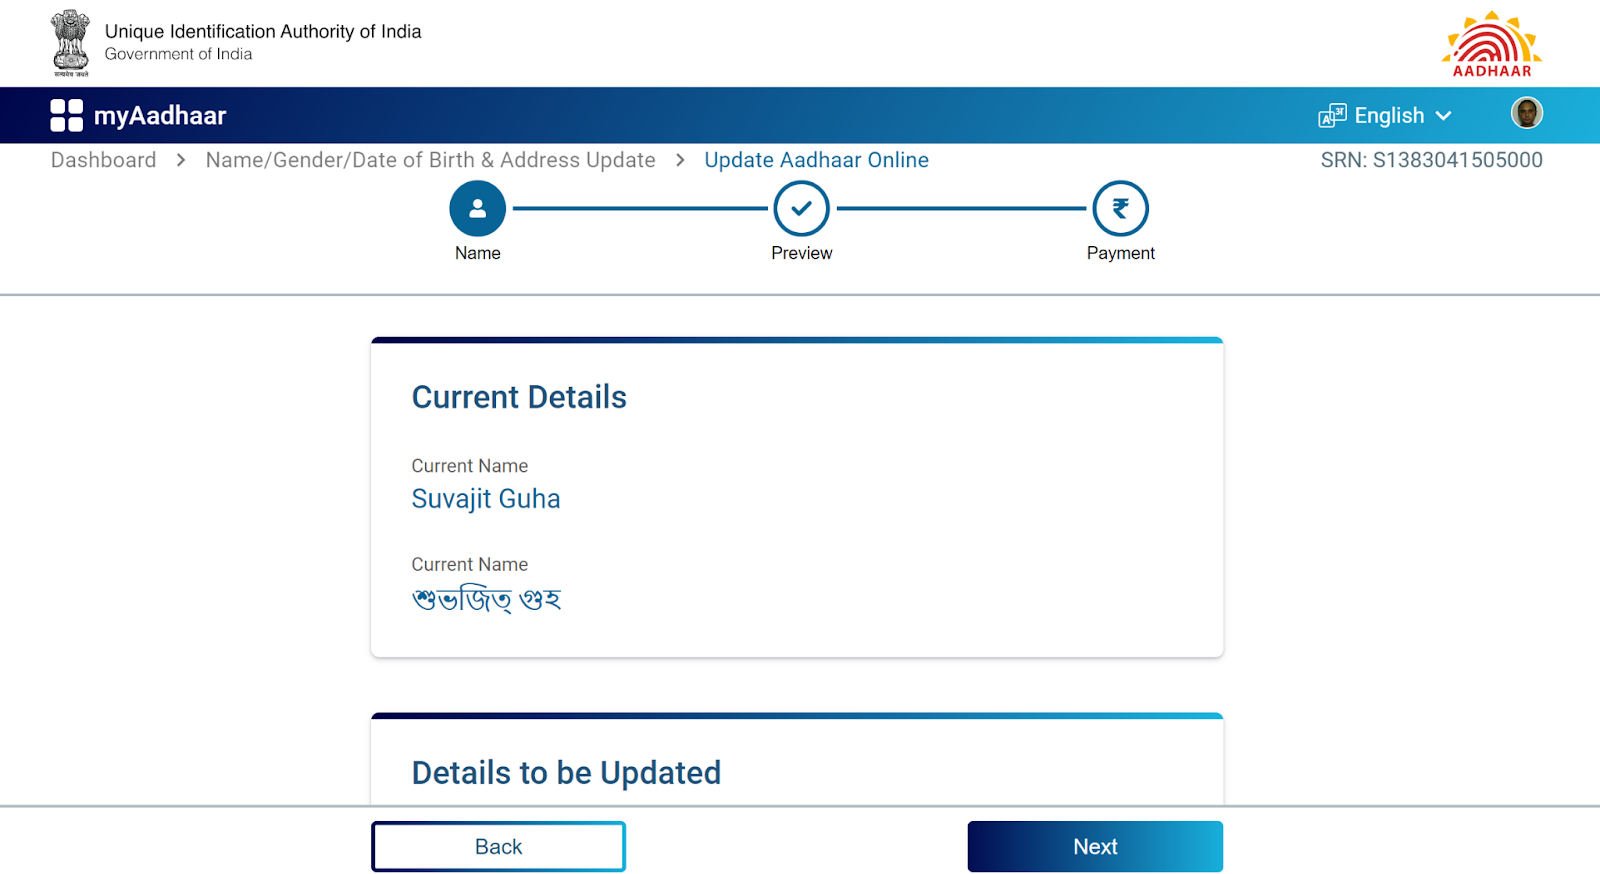
On the next screen, you can see the details as they currently are. Now, scroll down. You will see the field where you can enter the new details. But in order to complete the aadhaar card update, you will also have to upload a supporting document. You could either do it manually, or upload the document from DigiLocker, provided you have the document saved there.
- Step 9
Preview and validate the new details entered. You will also have to pay a non-refundable fee of ₹50. You can make the payment with your credit or debit card or using a net banking facility.
- Step 10
Upon successfully completing the payment, you will receive an Update Request Number (URN). You can use this URN to check your Aadhaar update status. The entire process of changing Aadhaar card details online can take up to 90 days.
- Step 11
Once the update is complete, take a printout of your Aadhar card with the latest details.
How to Update Address on Aadhaar Card Online?
You can change the residential address on your Aadhaar card on the official portal of UIDAI if you have a registered mobile number. Follow the given steps to do this:
Step 1: Visit the UIDAI’s official Self-Service Update Portal (SSUP).
Step 2: Click on the Login option, enter the captcha code displayed, and click ‘Send OTP’
Step 3: Once you receive the One Time Password on your registered mobile number, enter it on the screen and click on ‘Login’.
Step 4: From the available list of services, click on ‘Name/Gender/Date of Birth & Address Update’.
Step 5: On the next screen, click on ‘Update Aadhaar Online’.
Step 6: From the list of details you can correct/update, choose ‘Address’.
Step 7: On the next page, you will be shown the current details. Scroll down to enter the latest address details and upload your supporting documents. There is no limit on the number of times you can change your address on Aadhar.
Step 8: Validate the new address to complete your aadhaar card update. You will also have to pay a non-refundable processing fee of ₹50 using your debit card, credit card, or through net banking.
Step 9: You will receive an Update Request Number (URN), which can be used to track the aadhaar card update status. The update process could take up to 90 days.
How to Update Address in Aadhaar Card Without Document Proof?
Here are the steps that you can follow to update the address on your Aadhaar card if you cannot furnish any document proof:
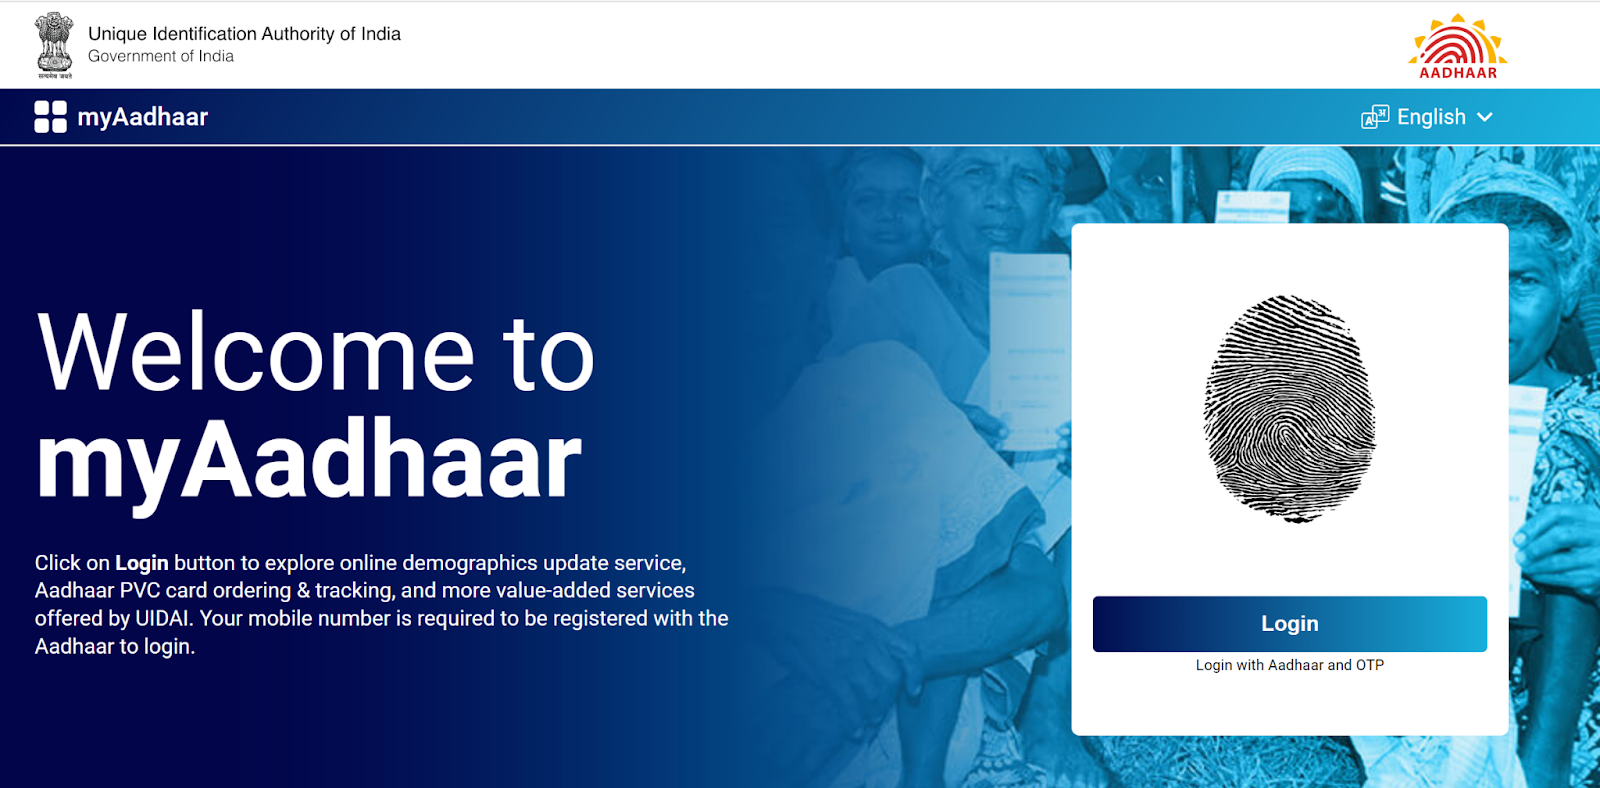
Step 1: Visit the official My Aadhaar portal (https://myaadhaar.uidai.gov.in).
Step 2: Click on the Update Address option and enter the new address.
Step 3: You will have to enter the 12-digit Aadhaar number of your head of family (HOF) or verifier.
Step 4: Once the Aadhaar number of the verifier is validated, you will have to upload a supporting document establishing your proof of relationship.
Step 5: Pay a non-refundable processing fee of ₹50. You can make the payment with your credit card, debit card, or with net banking.
Step 6: A service request number (SRN) will be generated and the HOF/verifier will be notified about the address change request via SMS.
Step 7: The HOF will need to visit the My Aadhaar portal and validate the request within 30 days of receiving the request. Failure to do so might lead to cancellation of your address change request. Your request will also be denied if the verifier declines to validate the request after logging in.
Step 8: Once the online aadhaar update is complete, you will receive a notification SMS on your registered mobile.
Also Read


How to Change Name on Aadhaar Card?
Step 1: Go to the Self Service Update Portal (https://ssup.uidai.gov.in/ssup/) of UIDAI.
Step 2: Click on ‘Login’, enter your Aadhaar number, the captcha code displayed on the screen, and click on ‘Send OTP’.
Step 3: Enter the OTP received on your registered mobile number and click ‘Login’.
Step 4: Click on the ‘Name/Gender/Date of Birth & Address Update’ card on the next page and move to step 5.
Step 5: Now, click on ‘Update Aadhaar Online’ from the available options.
Step 6: On the next page, click on ‘Proceed To Update Aadhaar’. But before you proceed, do read the instructions carefully.
Step 7: Now choose the detail that you want to update, which in this case will be your name. Please note that your name can only be updated twice on Aadhaar.
Step 8: The next screen will show you the old name. Scroll down to enter the new name. You will also have to upload a supporting document to validate the change. You can upload the document manually or from DigiLocker, if your document is saved there.
Step 9: Preview and validate the new details entered. You will also have to pay a non-refundable fee of ₹50. You can make the payment with your credit or debit card or with a net banking facility.
Step 10: Upon successfully completing the payment, you will receive an Update Request Number (URN). You can use this URN to check your Aadhaar update status. The entire process of changing Aadhaar card details online can take up to 90 days.
Step 11: Once the update is complete, take a printout of your Aadhar card with the new name. A physical copy will also be sent to you via speed post.
How to Update Date of Birth on Aadhaar Card?
Step 1: Go to the Self Service Update Portal (https://ssup.uidai.gov.in/ssup/) of UIDAI.
Step 2: Click on ‘Login’, enter your Aadhaar number, the captcha code displayed on the screen, and click on ‘Send OTP’.
Step 3: Enter the OTP received on your registered mobile number and click ‘Login’.
Step 4: Click on the ‘Name/Gender/Date of Birth & Address Update’ card on the next page and move to step 5.
Step 5: Now, click on ‘Update Aadhaar Online’ from the available options.
Step 6: On the next page, click on ‘Proceed To Update Aadhaar’. But before you proceed, do read the instructions carefully.
Step 7: Now choose the detail that you want to update, which in this case will be your date of birth. Please note that your date of birth can only be updated once on Aadhaar.
Step 8: The next screen will show your old date of birth. Scroll down to enter the new date of birth. You will also have to upload a supporting document to validate the change. You can upload the document manually or from DigiLocker, if applicable.
Step 9: Preview and validate the new details entered. You will also have to pay a non-refundable fee of ₹50. You can make the payment with your credit or debit card or with a net banking facility.
Step 10: Upon successfully completing the payment, you will receive an Update Request Number (URN). You can use this URN to check your Aadhaar update status. The entire process of changing Aadhaar card details online can take up to 90 days.
Step 11: Once the update is complete, take a printout of your Aadhar card with the new date of birth. A physical copy will also be sent to you via speed post.
How to Change Gender on Aadhaar Card?
Step 1: Go to the Self Service Update Portal (https://ssup.uidai.gov.in/ssup/) of UIDAI.
Step 2: Click on ‘Login’, enter your Aadhaar number, the captcha code displayed on the screen, and click on ‘Send OTP’.
Step 3: Enter the OTP received on your registered mobile number and click ‘Login’.
Step 4: Click on the ‘Name/Gender/Date of Birth & Address Update’ card on the next page and move to step 5.
Step 5: Now, click on ‘Update Aadhaar Online’ from the available options.
Step 6: On the next page, click on ‘Proceed To Update Aadhaar’. But before you proceed, do read the instructions carefully.
Step 7: Now choose the detail that you want to update, which in this case will be your gender. Please note that your gender can only be changed once on Aadhaar.
Step 8: The next screen will first show the old information. Scroll down to enter the new gender information. You will also have to upload a supporting document to validate the change. You can upload the document manually or from DigiLocker, if applicable.
Step 9: Preview and validate the new details entered. You will also have to pay a non-refundable fee of ₹50. You can make the payment with your credit or debit card or with a net banking facility.
Step 10: Upon successfully completing the payment, you will receive an Update Request Number (URN). You can use this URN to check your Aadhaar update status. The entire process of changing Aadhaar card details online can take up to 90 days.
Step 11: Once the update is complete, take a printout of your Aadhar card with the new date of birth. A physical copy will also be sent to you via speed post.
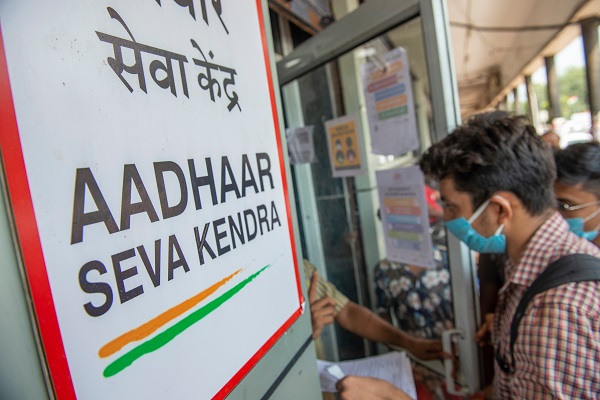
How to Change Aadhaar Card Details at a Permanent Enrollment Centre?
Aadhaar holders, aged 15 years or above, can visit an Aadhaar enrollment centre to update their biometric details- fingerprints, iris scans, and photographs. You can also update demographic details, including address, date of birth, and gender at the centre.
Here are the steps that you can follow to change or update your Aadhaar card details:
Step 1: Once you avail the Aadhaar card correction form from the Enrollment Centre, fill it out with all the relevant details.
Step 2: Attach self-attested copies of the supporting documents to the form. These will be used to validate your update request.
Step 3: Make the payment required for making the necessary changes or updates(for updating biometrics, it is Rs. 100, and for only demographics, it is Rs. 50).
Step 4: After you submit the form, you will get an acknowledgement slip with the Update Request Number (URN), which you can use to track the request.
How to Update Mobile Number on Aadhaar?
You will need a mobile number registered with your Aadhaar card to access the online services or the mAadhaar application. If you do not have a registered number, you will also not be able to get an OTP (One Time Password) on it for authentication purposes.
If your previously registered number has been deactivated or you want to add a new number, follow these steps. Note that there is no need for documents for this update.
Step 1: Visit a nearby Permanent Enrolment Centre.
Step 2: Fill out the Aadhaar card update/correction form.
Step 3: Make sure you have entered a current and active phone number. Next, submit the form to the Aadhaar operative.
Step 4: After manual verification of proof, pay the necessary fees for the aadhaar card update.
Step 5: The operator will enter the details and provide a biometric sign off for every update.
Step 6: After confirmation of changes, you will get an acknowledgement receipt with the URN.
How to Update a Photo in an Aadhaar Card?
While demographic information, such as name, address, date of birth, or gender can be updated online, to change biometric details, such as your photograph, you will have to visit your nearest Aadhar enrollment centre.
To complete the process, follow the steps below:
Step 1: Book an appointment before your visit. These centres are open every day between 9:30 AM and 5:30 PM
Step 2: Collect the Aadhaar card update form from the centre or download it from the UIDAI official website. Fill it out and submit it at the centre.
Step 3: At the centre, an Aadhaar operator will capture your photo on their phone.
Step 4: Pay a processing fee of ₹100.
Step 5: Once the payment is complete, an acknowledge slip containing the Update Request Number (URN) will be generated. Keep it handy for future reference or to track the status of the request for change.
Also Read

List of Documents Required to Make Corrections in Aadhaar Card
1. Proof of Identity
A supporting document containing your name and photo, will be required if you are planning to correct your name. Listed below are some documents that can be used as proof of identity:
- Passport
- PAN card
- Ration card
- Voter card
- Driving licence
- Marriage certificate
- Disability identification card
2. Proof of Address
Any of the following documents can be submitted as proof of address:
- Passport
- Voter ID
- Ration card
- Passbook of post office or account statement
- Applicant’s bank passbook
- Insurance policy
3. Proof of Date of Birth
Here is a list of documents that will work as supporting documents for correcting date of birth on an Aadhar card:
- Birth Certificate
- PAN card
- SSC certificate
- Passport
- Pension payment order
4. Proof of Relationship
It is required to correct or update the relation printed on your Aadhaar card. The list of documents that can be used as Proof of Relationship are:
- Passport
- Marriage certificate
- Pension card
- Birth certificate
- Family entitlement documents issued by the central or state government
Things to Remember While Updating Your Aadhaar Details
- You can update your name on the Aadhaar card only twice in your lifetime. Hence, you should be careful when applying for a name change.
- You can change your date of birth and gender only once. Moreover, you can only change your date of birth only if it is unverified.
- Double check any changes you have entered to ensure that the data and spelling are correct.
- Note down the URN somewhere just in case you lose the acknowledgement slip.
- Make sure to provide documentary evidence for the updates you have requested.
- For changes due to life events (marriage, change of residence), make sure to update your Aadhaar card details.
Top Reasons Why Your Aadhaar Card Update Request Might Get Rejected
Your Aadhaar card update request can be rejected due to the following reasons:
- If you have uploaded the wrong Proof of Address or Proof of Identity during Aadhaar update.
- There is a transliteration error, meaning the details provided do not match with the supporting documents.
- You have not self-attested the Proof of Address, Proof of Identity, or other supporting documents.
- The documents uploaded to the myAadhaar Self Service Update Portal are not scanned copies of the original documents.
- If the Aadhaar number or mobile number shared during the update is not correct.
- The supporting documents are not self-attested by the Aadhar cardholder.
- Supporting documents submitted during the update are not in the name of the cardholder.
Final Word
You can use UIDAI’s official portal to update various demographic details on your Aadhaar card, provided that you have a mobile number that is registered with UIDAI. But for biometric updates, you will have to visit an Aadhaar Enrollment Centre in person. It is also recommended that you update your biometric details once every 10 years to keep your Aadhaar card up to date.To know more about the various aspects of Aadhar, check our Aadhar Knowledge Centre.
FAQs
For a change of name, you will need to upload a scanned copy of proof of identity. You will need to provide age proof to update your date of birth and provide OTP authentication for updating your gender.
Yes, children holding Blue Aadhaar cards (Baal Aadhaar) need to update all their biometric data once they reach 5 years of age. Furthermore, after they reach 15 years of age, they will need to provide new biometric data again.
Yes, if you have ill-defined or missing fingerprints, the person capturing your biometrics will note your exemption. Similarly, people with cataracts, retina damage, and partial or complete blindness can get an exception for the iris scan.
An e-Aadhaar is a password-protected digital copy of your Aadhaar card, which you can use for all purposes. To download this soft copy, visit UIDAI’s website and provide your Aadhaar number or Enrolment ID to download the electronic copy of your Aadhaar card.
The following are some possible causes of rejection in relation to your Aadhaar card correction:
-Absence of adequate documents for verification of changes
-Documents sent for verification were not self-attested
-Incorrect information was provided
-Details mentioned in the form did not match with the documents attached
Yes, you can. Simply visit the UIDAI self-service portal to complete the process.
You can submit any of the following documents to support your request for change:
-Passport
-Voter ID
-Ration card
-Disability ID Card
-A photo id card issued by the government
-Passbook of post office or account statement
-ST/SC/OBC certificate
-Applicant’s bank passbook
-Insurance policy
-Electricity, water, or telephone landing page
No, you cannot. To update your registered mobile number, you will have to visit an Aadhar enrollment centre. Submit the completed Aadhaar update form, along with the supporting documents, and pay the non-refundable processing fee to the Aadhar operator. Once done, you will receive an acknowledgement receipt.
The following data can be changed on your Aadhar:
-Name
-Address
-Date of Birth
-Gender
-Photograph
Yes, a physical copy of your updated Aadhaar will be sent to you via speed post, which could take up to 90 days. However, you could also download a digital copy from the UIDAI website.